Vehicle Inspection Test

Brake Checks

Brake Checks

Correct Brake checks are a must! Detailed, Step by Step instructions follow.

NOTE: Failure to correctly perform all components of the hydraulic or air brake check will result in automatic failure of the vehicle inspection test.

Step One:

Parking Brake Test - Step 1

Step Two:

Service Brake Test - Step 2

Step 3 depends on the type of brakes you have:

Step 3 if you have Hydraulic Brakes
Step 3 Part 1 if you have Air Brakes
Step 3 Part 2 if you have Air Brakes
Step 3 Part 3 if you have Air Brakes
Special Note: Air brake check procedures vary from vehicle to vehicle and different drivers may have learned different procedures; however, all procedures are designed to confirm that the correct safety devices operate at the appropriate times as the air pressure drops from “normal” to “very low.”
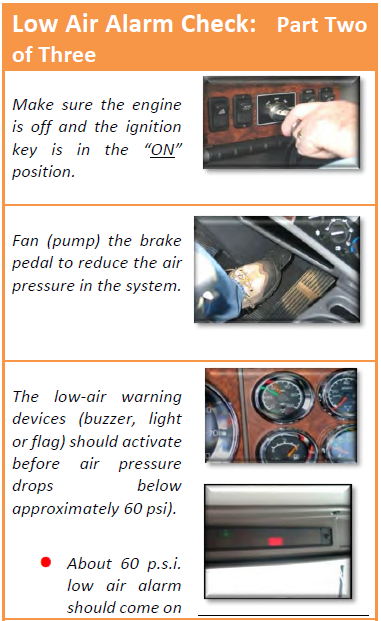
Not all valves will pop out on every vehicle, but an audible discharge of air should be recognizable. The “Air Brake System Check” must be done correctly and in order (Leak Down, Low Air Alarm and Tractor Protection Valve) to pass the skills test.
If you forget to turn the key “on”, but recognize your mistake before you complete the check(valve pops), you will be permitted to start the procedure over. WHEN THE VALVE “POPS” THE TEST IS OVER.

Air Brake Check (Air Brake Equipped Vehicles Only)

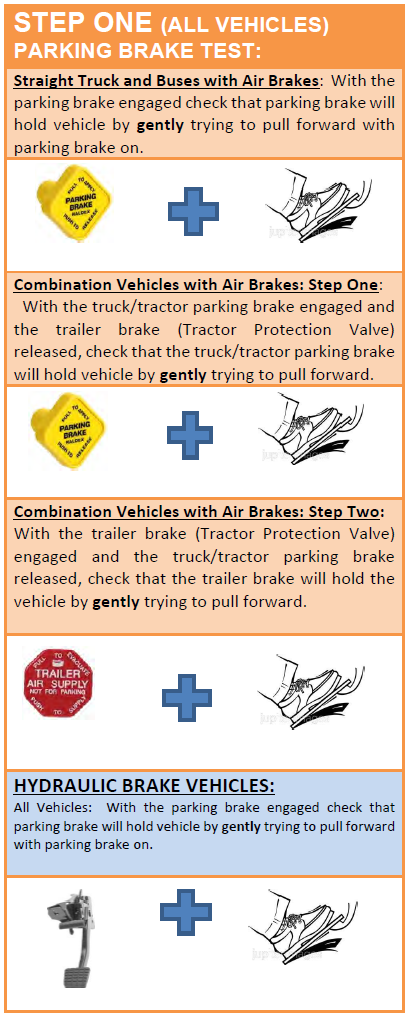
WARNING: Failure to perform all three components of the air brake check correctly will result in an automatic failure of the vehicle inspection test. Air brake safety devices vary. However, this procedure is designed to see that any safety device operates correctly as air pressure drops from normal to a low air condition. For safety purposes, in areas where an incline is present, you will use wheel chocks during the air brake check. The proper procedures for inspecting the air brake system are as follows:

  1. With the air pressure built up to governor cutoff (120 – 140 psi), shut off the engine, chock your wheels if necessary, release the parking brake (all vehicles), and the tractor protection valve (combination vehicle) and fully apply the foot brake. Hold the foot brake for one minute. Check the air gauge to see if the air pressure drops more than three pounds in one minute (single vehicle) or four pounds in one minute (combination vehicle).
  2. Without re-starting the engine, turn electrical power to the on or battery charge position. Begin fanning off the air pressure by rapidly applying and releasing the foot brake. Low air warning devices (buzzer, light, flag) should activate before air pressure drops below 60 psi or level specified by the manufacturer.
  3. Continue to fan off the air pressure. At approximately 40 psi on a tractor-trailer combination vehicle (or level specified by the manufacturer), the tractor protection valve and parking brake valve should close (pop out). On other combination vehicle types and single vehicle types, the parking brake valve should close (pop out). Valves should pop between 20 and 45 PSI.